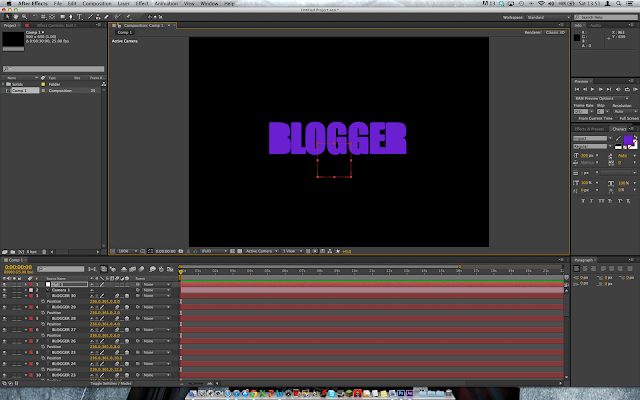
I used the text tool to write out a word like this:
In the lower left corner I ticked the 3D box (at this point it is optional to tick the motion blur box for effect) then copy and pasted the layer 30 times. You can see the two boxes ticked here:
Next, select all the layers (click top layer and shift click the bottom layer) and press P, now the position for each layer should come up. Unselect all the layers. Change the last two digits (0.0) in each layer to go up from 0.0 to 58 by going up by 2 in each layer. You can now select all layers and press P again to hide the position.
Next go to Layer - New - Camera and select the camera and press OK on the window that pops up. Do the same but selects a new Null Object. It should be looking a bit like this now:

To make that null object the 'parent' of all the layers you will need to select all the layers and use the tool that looks a bit like a pigs tail from the top layer of the text (not the camera layer) and click and drag that whip tool to the null object layer like this:

Make sure to tick that 3D box and motion blur for the null object like it is for all the layers. Now select all the text layers between 30 and 1 (29 to 2), go to Effect - Colour correction - Brightness and Contrast, then turn down the brightness. It will make it look like this:
Now go to the null object and bring out the 'Transform' by using the arrows to the left like this:
You can use the X, Y and Z Rotations to add a spin on the object. As the null object is invisible and it controls all the layers when the Null object is rotated the entire text moves as well. Move the dial along the timeline to about 3 seconds along then click the stop watch symbol on the Y rotation. Only then you should change the Rotations that you want. In my case I want it to spin sideways 3 times so I changed the Y rotation to 3x+0.0* while still on the 3 second marker and that Keyframe selected. For me it looks like this:
Bring the time head back to 0 then press SPACE. The animation will render until it is completed then if you don't make more changes it will spin smoothly.
To make the composition a bit tidier for future work you can highlight the text layers 29 to 0 and click on this symbol for one of them then click the big one at the top:
This will hide all unnecessary layers. Go to the region of interest tool which is directly under the composition and it looks like a box inside a bigger box and make sure all unnecessary space is outside the box and that every frame of your spin is still inside the box then go to Composition - Crop composition to region of interest.
Now the spin is finished to save it you will have to go onto the end of the timeline and pull the two yellow ends on the seconds part of the timeline to 3 seconds so the animation loops when it hits 3 seconds instead of going all the way to 30 (or what the timeline was set to).
Make a new folder somewhere, maybe on your desktop then go to Composition - Add to Render Que.
Click on 'Lossless' and change the Format to JPEG Sequence Save composition 1 to a folder as a JPEG after Rendering it.
Open Flash (Actionscript 2.0) and make a new movie clip. While inside that movie clip go to import, choose the folder its al saved in, choose the first image and import the sequence to stage. Now go to scene 1 and bring the movie clip you just made from the library.


No comments:
Post a Comment